Building your own website
Interested in building a personal webpage or a blog? Or perhaps a family events & holiday photo book/album online? But not interested in spending monies on domain & hosting? With a little effort you can build your own website and host it on your home-web-server at virtually no cost, besides Internet connection and electricity fees you should have when reading this.
Let see what you would need to setup a webserver.
What is needed:
- Internet connection (assuming you have one already). You need a reasonable upload-speed if you want to host a webpage. ADSL usually have faster download speeds than up-load speeds.
- Router with port-forward feature. Most home modem/routers have this features standard build in. Check the operation manual if in doubt.
- (Un)used computer. If you have an older PC somewhere lying around gathering dust, it is most likely a good candidate to be used as a server. There is no need for a monitor and keyboard & mouse to be permanently connected to the PC, but is needed during the initial installation. The CPU should have at least 2 cores, as in Pentium Dual-Core or AMD dual-core, or multi-core. Modern server software is written for multi-core software. PC's manufactured after 2006 are mostly OK.
If you want to experiment first, try it out in a Virtual Machine using VirtualBox or VMware. - Domain name. Although not strickly necessary, it makes it easier to remember than an IP address. A number websites offer free DDNS service; NO-IP, Free DNS Afraid , Securepoint just to name a few. The DDNS service will also update if the (dynamic) public IP address on your router changes
- Linux server distribution. There are many. By definition, a server does not have/need a Graphical User Interface (GUI). However A webserver can run perfectly on a desktop PC that is always 'on'. But running a GUI on an old PC would strain resources to the max and slowdown the server application. Even if you have a modern PC, running video games or other resource intensive apps will slow down the webserver app significatly. In other words, you want your server PC to be used for web-apps only.
In this exercise, UBUNTU-server is used. Other Linux-distro's will need different steps to complete the job. Most distro's have good online documentation and wiki's.
Install UBUNTU 20.04 server
Overview
Ubuntu Server is a variant of the standard Ubuntu you already know, tailored for networks and services. It’s just as capable of running a simple file server as it is operating within a 50,000 node cloud. Unlike the installation of Ubuntu Desktop, Ubuntu Server does not include a graphical installation program. Instead, it uses a text menu-based process.
This guide will provide an overview of the installation from either a DVD or a USB flash drive.
Requirements
Ubuntu 20.04 Server Edition provides a common, minimalist base for a variety of server applications, such as file/print services, web hosting, email hosting, etc.
This version supports four 64-bit architectures:
- amd64 (Intel/AMD 64-bit)
- arm64 (64-bit ARM)
- ppc64el (POWER8 and POWER9)
- s390x (IBM Z and LinuxONE)
The recommended system requirements are:
- 2 GHz dual core processor or better
- RAM: 4 gigabyte or more
- Disk: 25GB with a minimum of 2.5 gigabytes free
- Internet access is helpful
- Either a DVD drive or a USB port for the installer media
Download the installation package
- Get UBUNTU server 20.04 ISO file from the UBUNTU download page.
- Burn the ISO file to CD / DVD or create a bootable USB medium.
Boot from install media
To trigger the installation process, perform the following:
- Put the Ubuntu DVD into your DVD drive (or insert the USB stick or other install media).
- Make sure your boot-order in BIOS is set to read from the CD or USB device first
- Restart your computer.
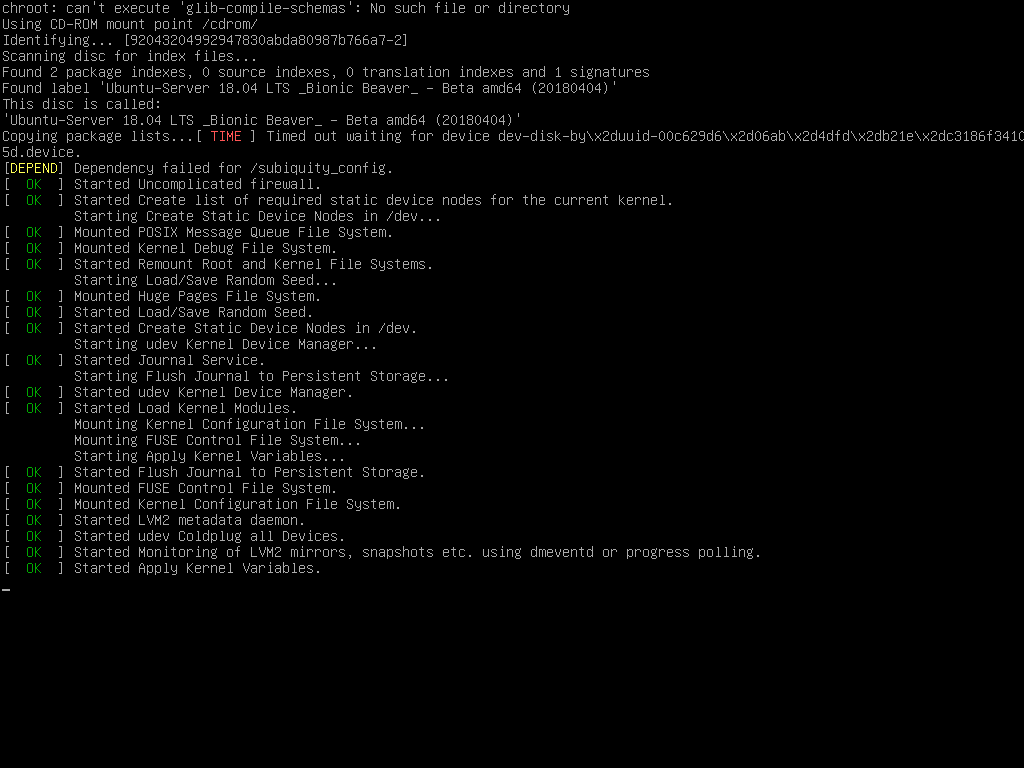
After a few moments, you should see messages like those shown below on the screen…
Choose your language
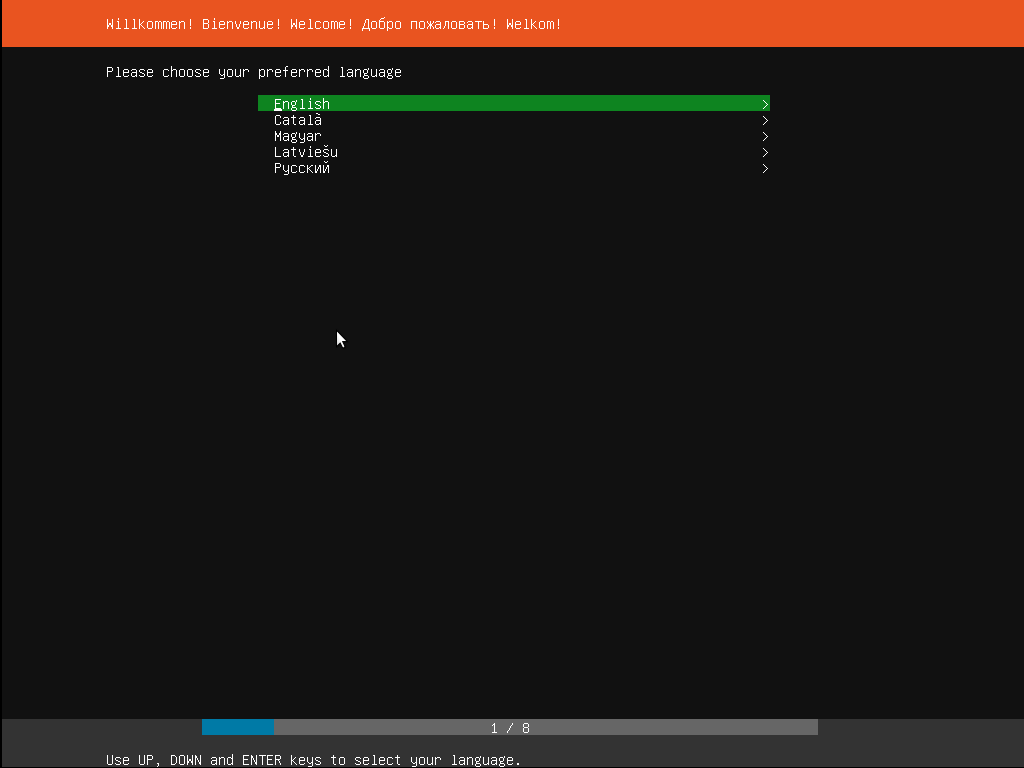
After the boot messages appear, a ‘Language’ menu will be displayed.
As the message suggests, use the Up, Down and Enter keys to navigate through the menu and select the language you wish to use.
Choose the correct keyboard layout
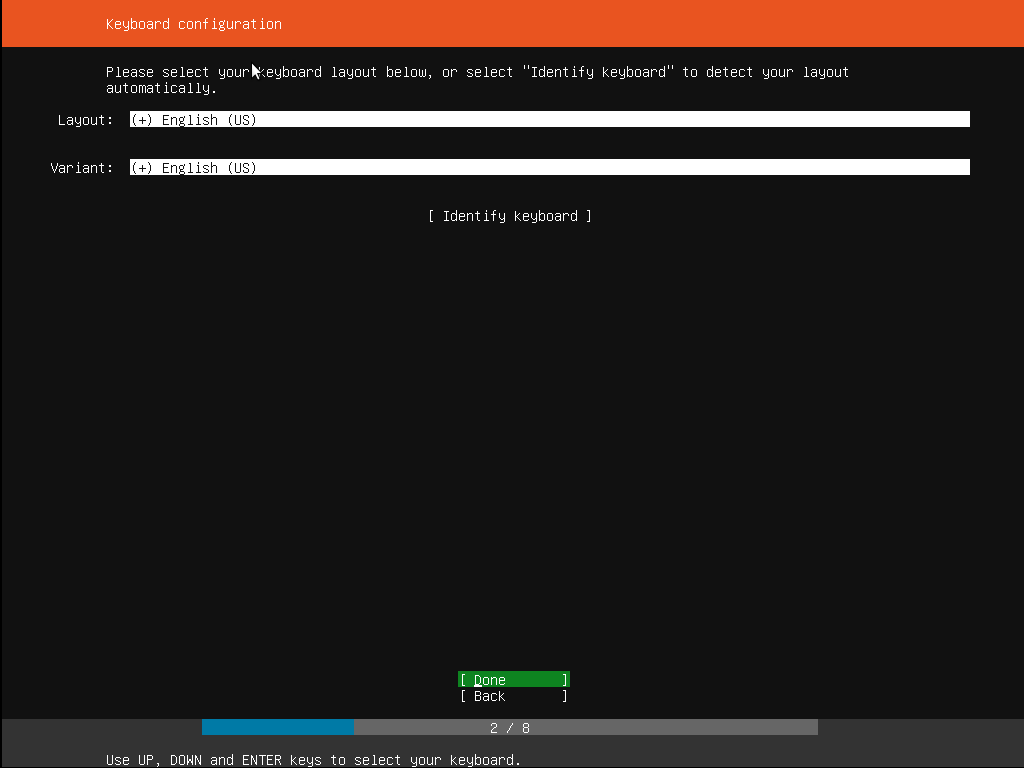
Before you need to type anything in, the installer will next display a menu asking you to select your keyboard layout and, if applicable, the variant.
If you don’t know which particular variant you want, just go with the default - when Ubuntu Server has been installed you can test and change your preferences more easily if necessary.
Choose your install
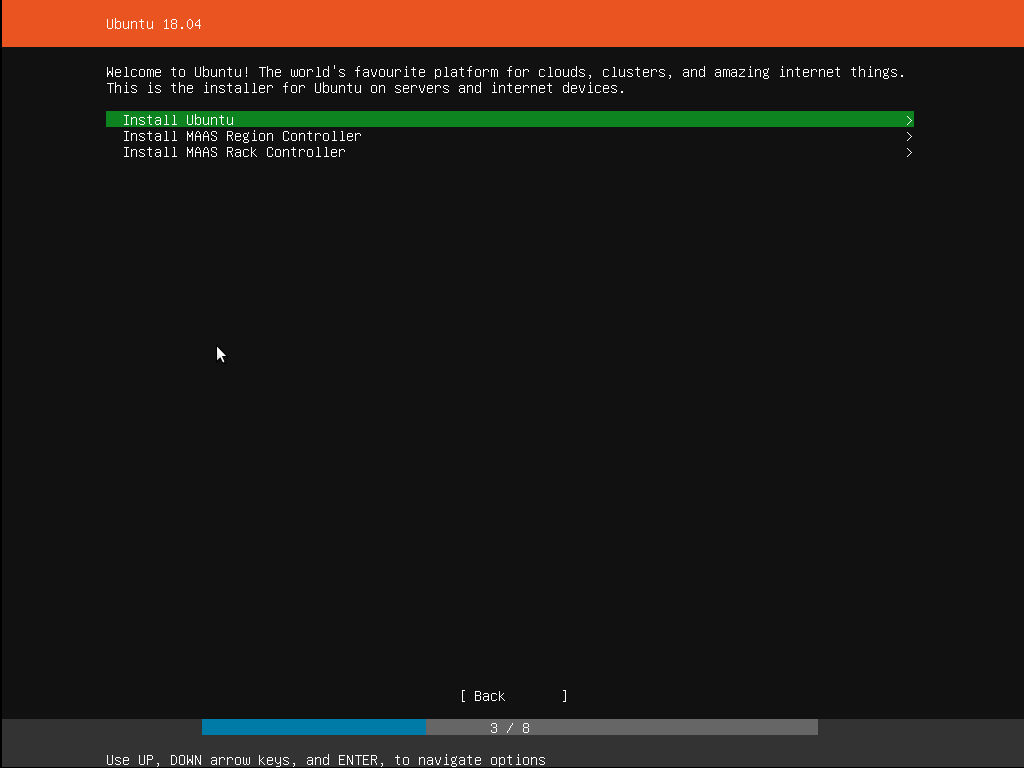
Now we are ready to select what you want to install. There are three options in the menu:
The bottom two options are used for installing specific components of a Metal As A Service (MAAS) install.
If you are installing MAAS, you should check out the MAAS documentation for more information on this!
The rest of this tutorial assumes you select the first option, Install Ubuntu.
Networking
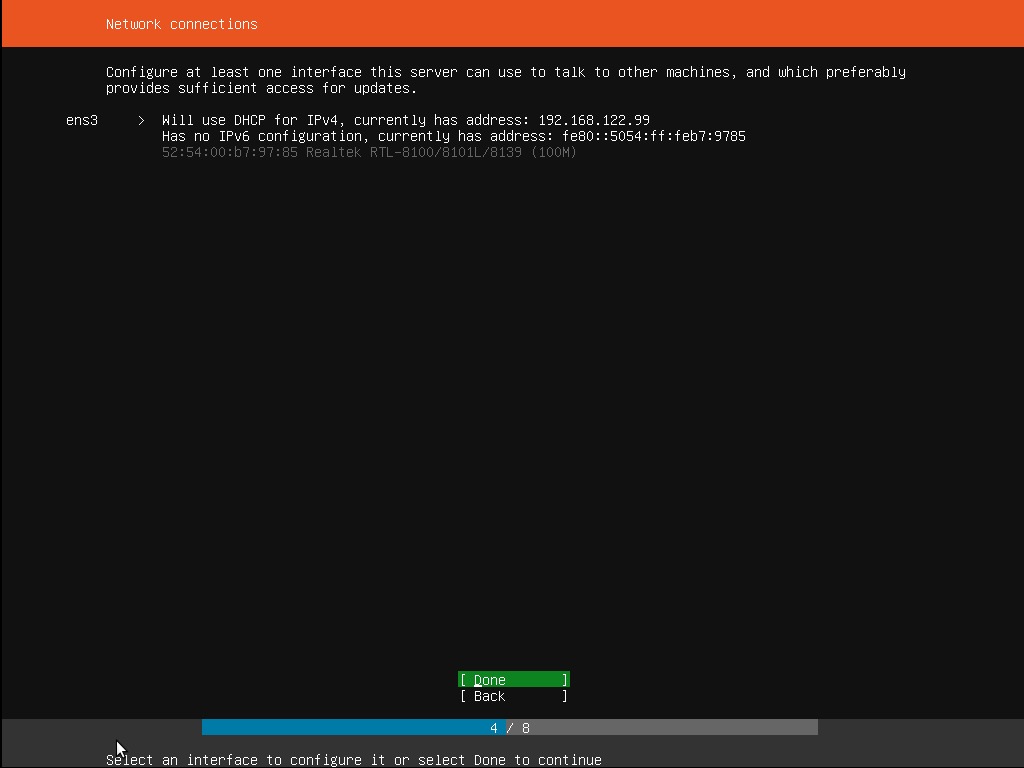
The installer will automatically detect and try to configure any network connections via DHCP.
It is recommended to have a fixed IP address so you know how to access the sever from another device(s). Use a reserved IP address on your router DHCP setting or choose an IP outside the routers DHCP range; example: if the router's IP range is from 192.168.1.100 to 192.168.1.200, set network IP address in the range of 192.168.1.201 to 192.168.1.254.
If no network is found, the installer can continue anyway, it just won’t be able to check for updates. You can always configure networking after installation.
Configure storage
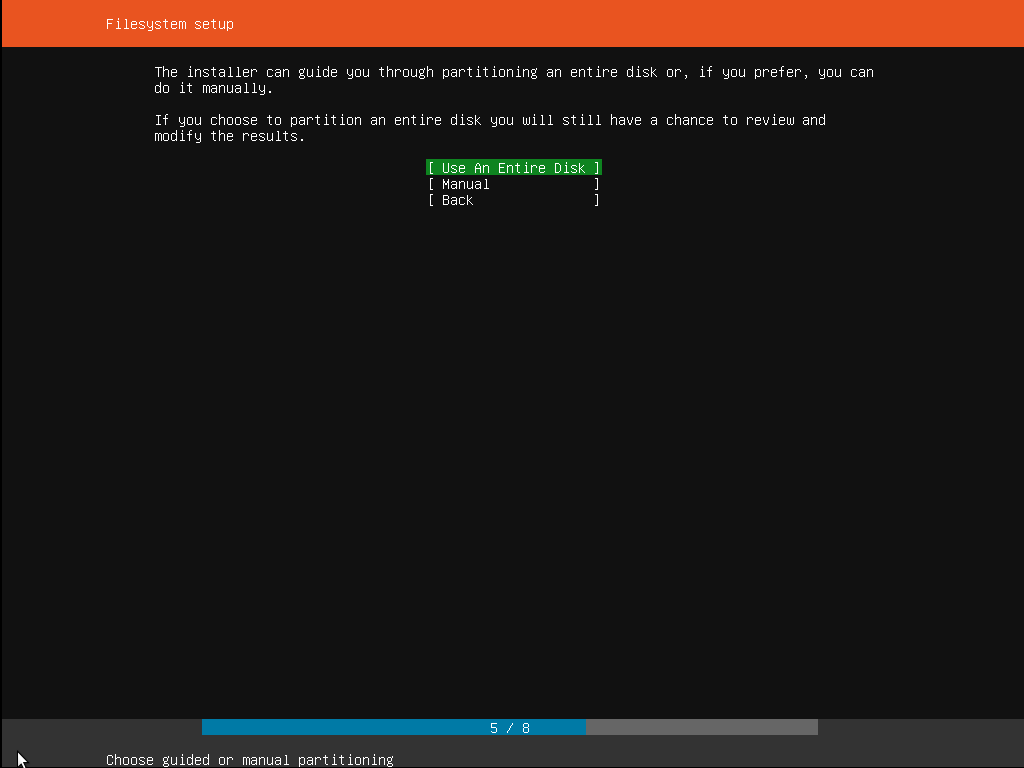
The recommended install is to have an entire disk or partition set aside for running Ubuntu.
If you need to set up a more complicated system, the manual option will allow you to select and reorganize partitions on any connected drives.
Note that Ubuntu no longer requires a separate partition for swap space, nor will the automated install create one.
Select a device
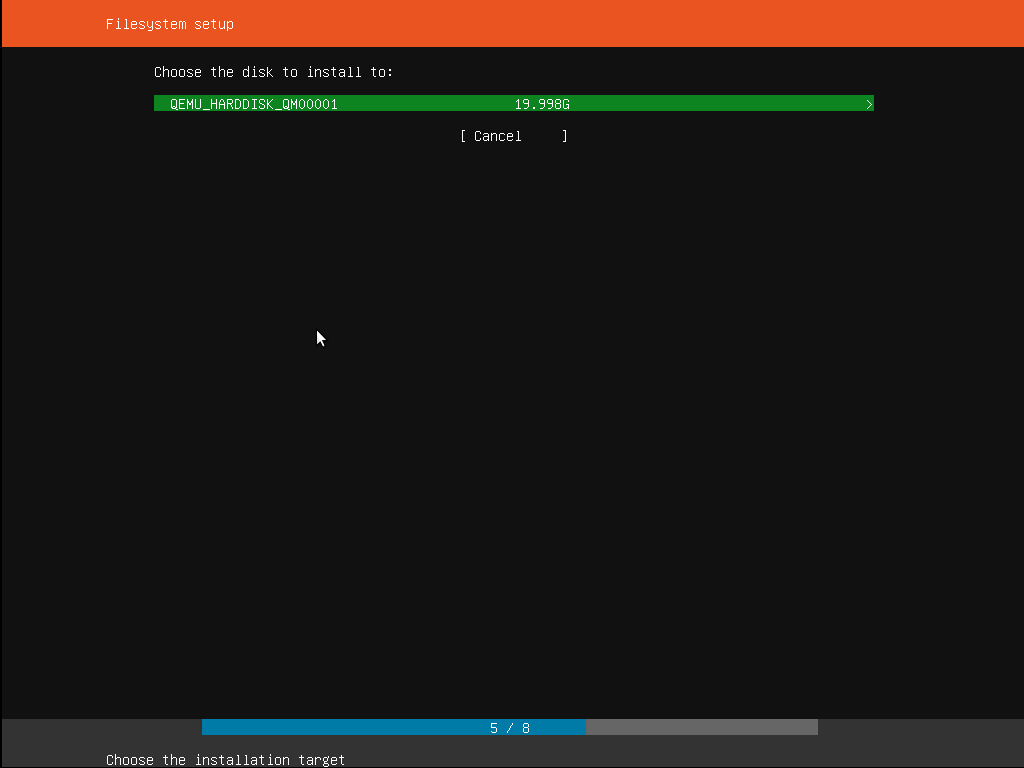
Select a disk from the ones detected on the system.
To help identification, the drives will be listed using their system ID. Use the arrow keys and enter to select the disk you wish to use.
Confirm partitions
With the target drive selected, the installer will calculate what partitions to create and present this information.
If this isn’t what you expected to see (e.g., you have selected the wrong drive), you should use the arrow keys and enter to select Back from the options at the bottom of the screen. This will take you back to the previous menu where you can select a different drive.
It is also possible to manually change the partitions here, by selecting Edit Partitions. Obviously you should only select this if you are familiar with how partitions work.
When you are happy with the disk layout displayed, select Done to continue.
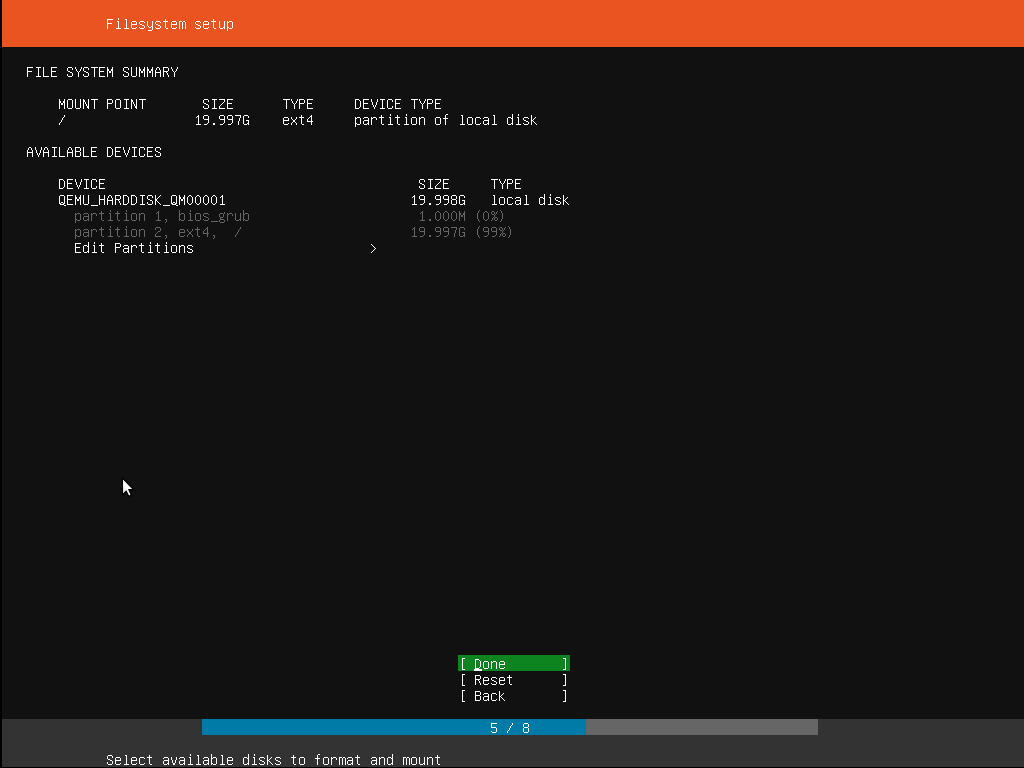
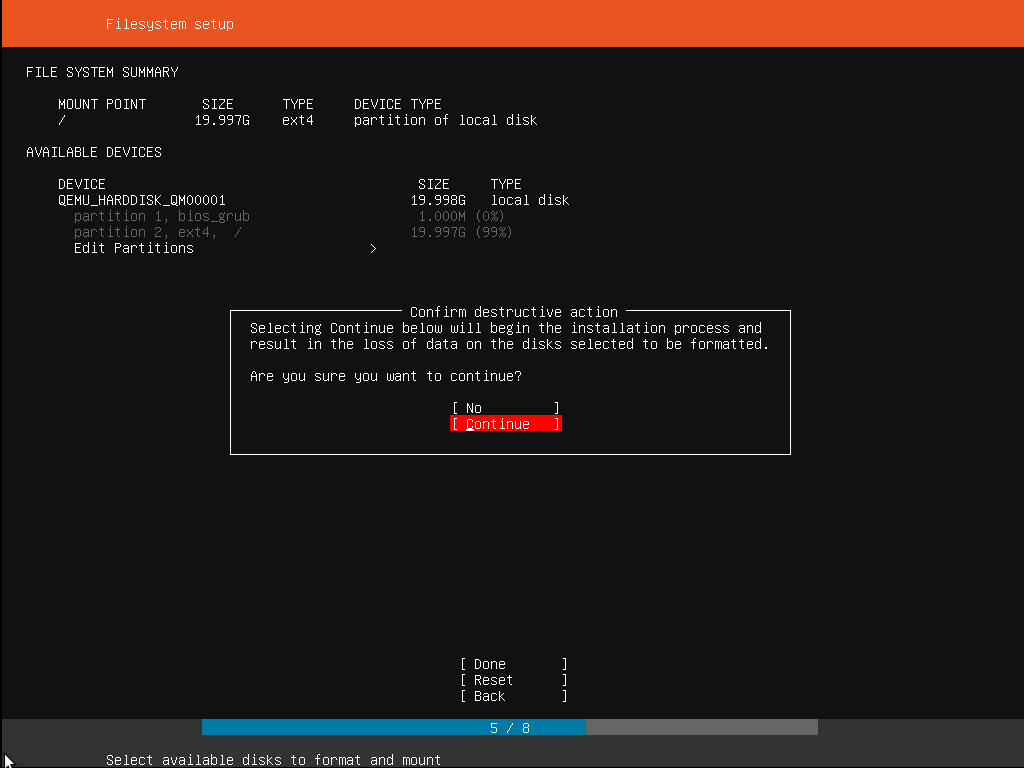
Confirm changes
Before the installer makes any destructive changes, it will show this final confirmation step. Double check that everything looks good here and you aren’t about to reformat the wrong device!
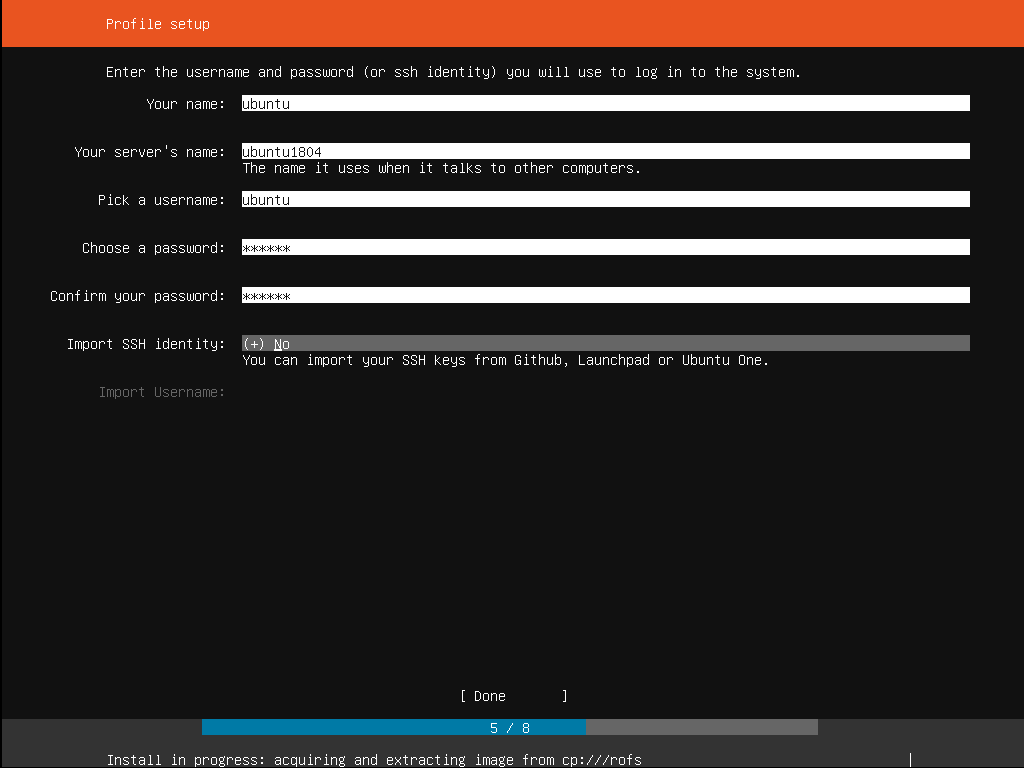
Set up a user Profile
The software is now being installed on the disk, but there is some more information the installer needs. Ubuntu Server needs to have at least one known user for the system, and a hostname. The user also needs a password.
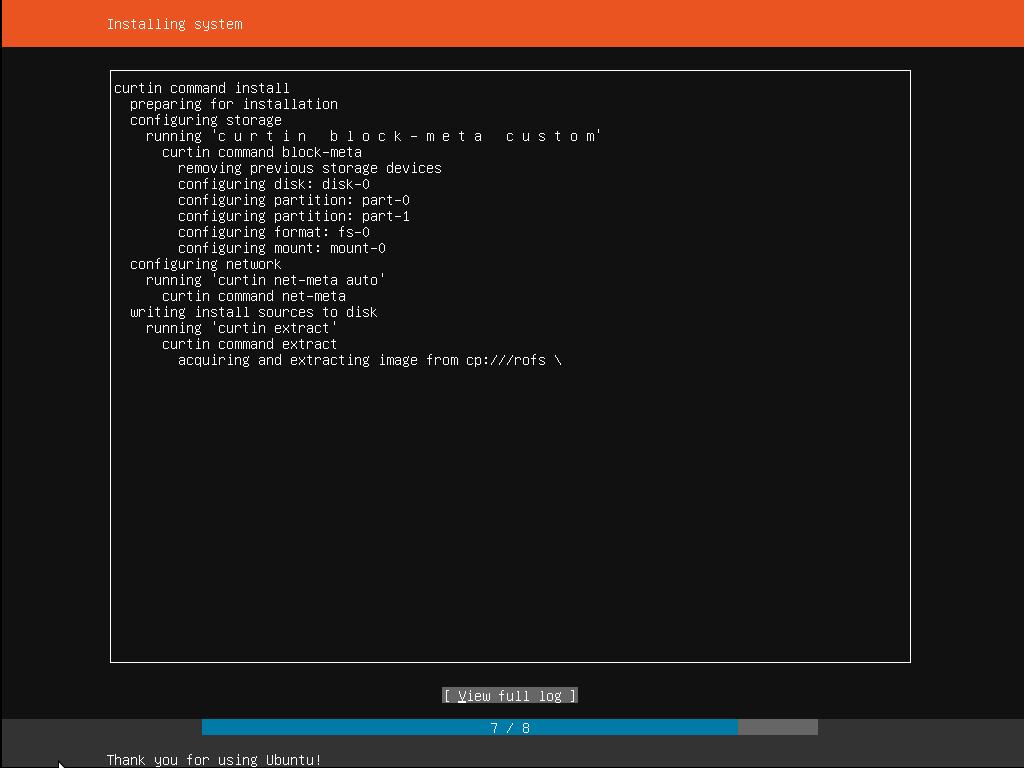
Install software
Once you have finished entering the required information, the screen will now show the progress of the installer. Ubuntu Server now installs a concise set of useful software required for servers. This cuts down on the install and setup time dramatically. Of course, after the install is finished, you can install any additional software you may need.
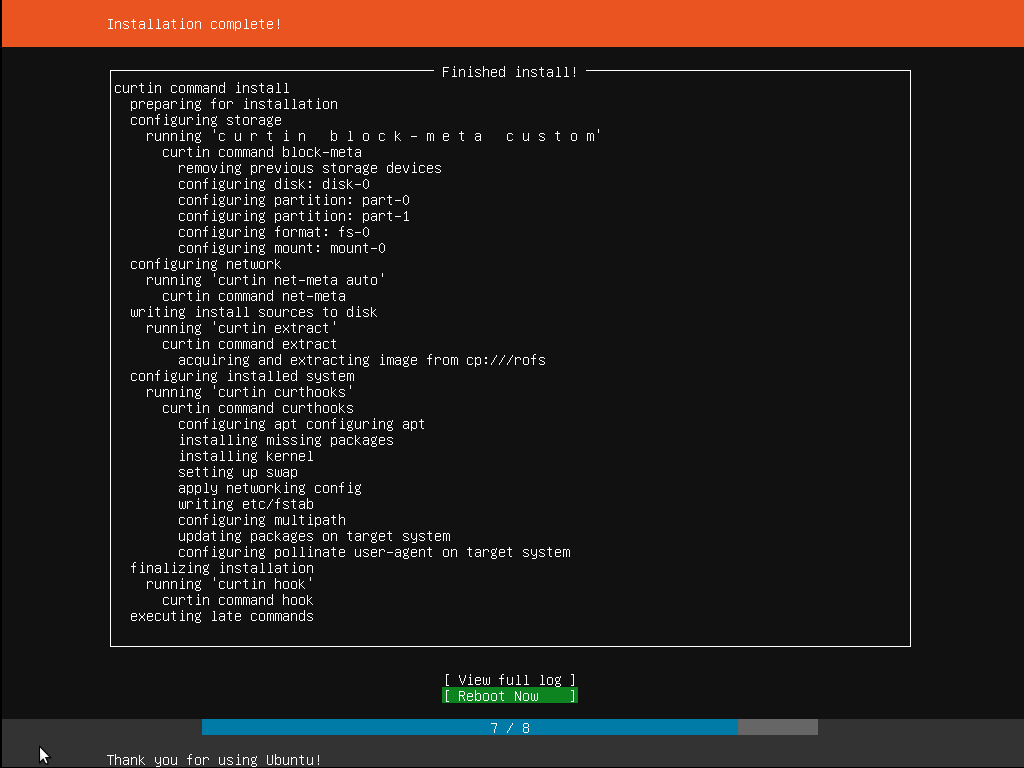
Installation complete
When the install is complete, you will see a message like this on the screen.
Remember to remove the install media, and then press enter to reboot and start the server.
Welcome to Ubuntu!
Initial Server Setup with Ubuntu 20.04
The new Ubuntu 20.04 server need some important configuration steps as part of the basic setup. These steps will increase the security and usability of your server, and will give you a solid foundation for subsequent actions.
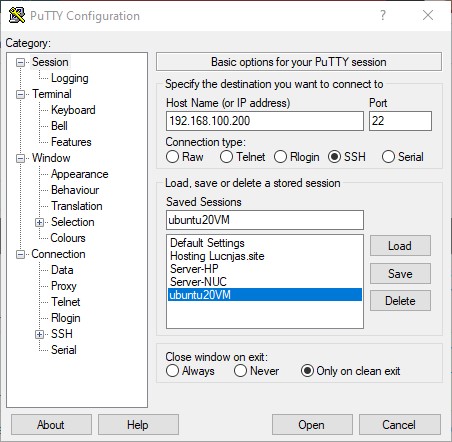
This requires a Command Line Interface (CLI). Either you can continue on the server itself with the connected screen and keyboard or connect to the server via SSH (secure TELNET) from another device that has SSH client installed. A recommended client is PUTTY. Windows 10 also has a build in SSH client that can run from the command window
First time login
SSH is activated by default and should be use over unsafe TELNET. Open your favorite SSH client and enter the IP address set in the 'Networking' part of the installation. If you forgot, check on the server console with command
Using Putty; Set the IP address and select ssh (port 22). Click open to start the terminal.
From Windows command window enter: $ ssh Username@server_ip
Login with password created during the 'user profile' part of the installation. This User should have 'root' or superuser privileges, which you will need to install the LAMP stack and other features later.
Uncomplicated Firewall (UFW)
If you are behind a router you are fairly isolated from the Internet. If you feel the need for some extra protection, configure the UFW.
Applications can register their profiles with UFW upon installation. These profiles allow UFW to manage applications by name. OpenSSH, the service allowing to connect to the server now, has a profile registered with UFW. Let's see if there are any registered:
$ sudo ufw app list sudo means 'SuperUser DO'. It elevates the command to superuser and requires a (superuser)-password.
The answer most likely be:
Available applications:
 OpenSSH
We need to make sure that the firewall allows SSH connections so that we can log back in next time.
$ ufw allow OpenSSH
Enable UFW
$ ufw enanble
Check the status:
$ ufw status
Status: active
To               Action  From
--               ------  ----
OpenSSH          ALLOW   Anywhere
OpenSSH (v6)     ALLOW   Anywhere (v6)
UFW is up and running and new web-apps will be added later
UBUNTU Server successfully installed
Install LAMP Stack
Introduction
A “LAMP” stack is a group of open-source software that is typically installed together in order to enable a server to host dynamic websites and web apps written in PHP. This term is an acronym which represents the Linux operating system, with the Apache web server. The site data is stored in a MySQL database, and dynamic content is processed by PHP.
Other versions like WAMP is suited for Windows and more versions are listed here.
The installation requires a Command Line Interface (CLI). Either you can continue on the server itself with the connected screen and keyboard or connect to the server via TELNET or better SSH (secure TELNET).
Installing Apache
The Apache web server is among the most popular web servers in the world. It’s well documented, has an active community of users, and has been in wide use for much of the history of the web, which makes it a great default choice for hosting a website.
Assumed to be logged in and have root privilege:$ sudo apt update
$ sudo apt install apache2
Press Y when promted to install.
Update UFW.$ sudo ufw app list
Should display:Available applications:
Apache
Apache Full
Apache Secure
OpenSSH
What does this mean:
- Apache: This profile opens only port
80(normal, unencrypted web traffic). - Apache Full: This profile opens both port 80 (normal, unencrypted web traffic) and port 443 (TLS/SSL encrypted traffic).
- Apache Secure: This profile opens only port
443(TLS/SSL encrypted traffic).
Although no secure certificate is available yet, let's use the FULL profile.$sudo ufw allow in "Apache"
Verify:
$ ufw status
Status: active
To               Action  From
--               ------  ----
OpenSSH          ALLOW   Anywhere
Apache Full      ALLOW   ANYWHERE
OpenSSH (v6)     ALLOW   Anywhere (v6)
Apache Full (v6) ALLOW   ANYWHERE (v6)
Do a spot check right away to verify that everything went as planned by visiting your server’s IP address in your web browser: http://server-ip-addressThe following page should be downloaded.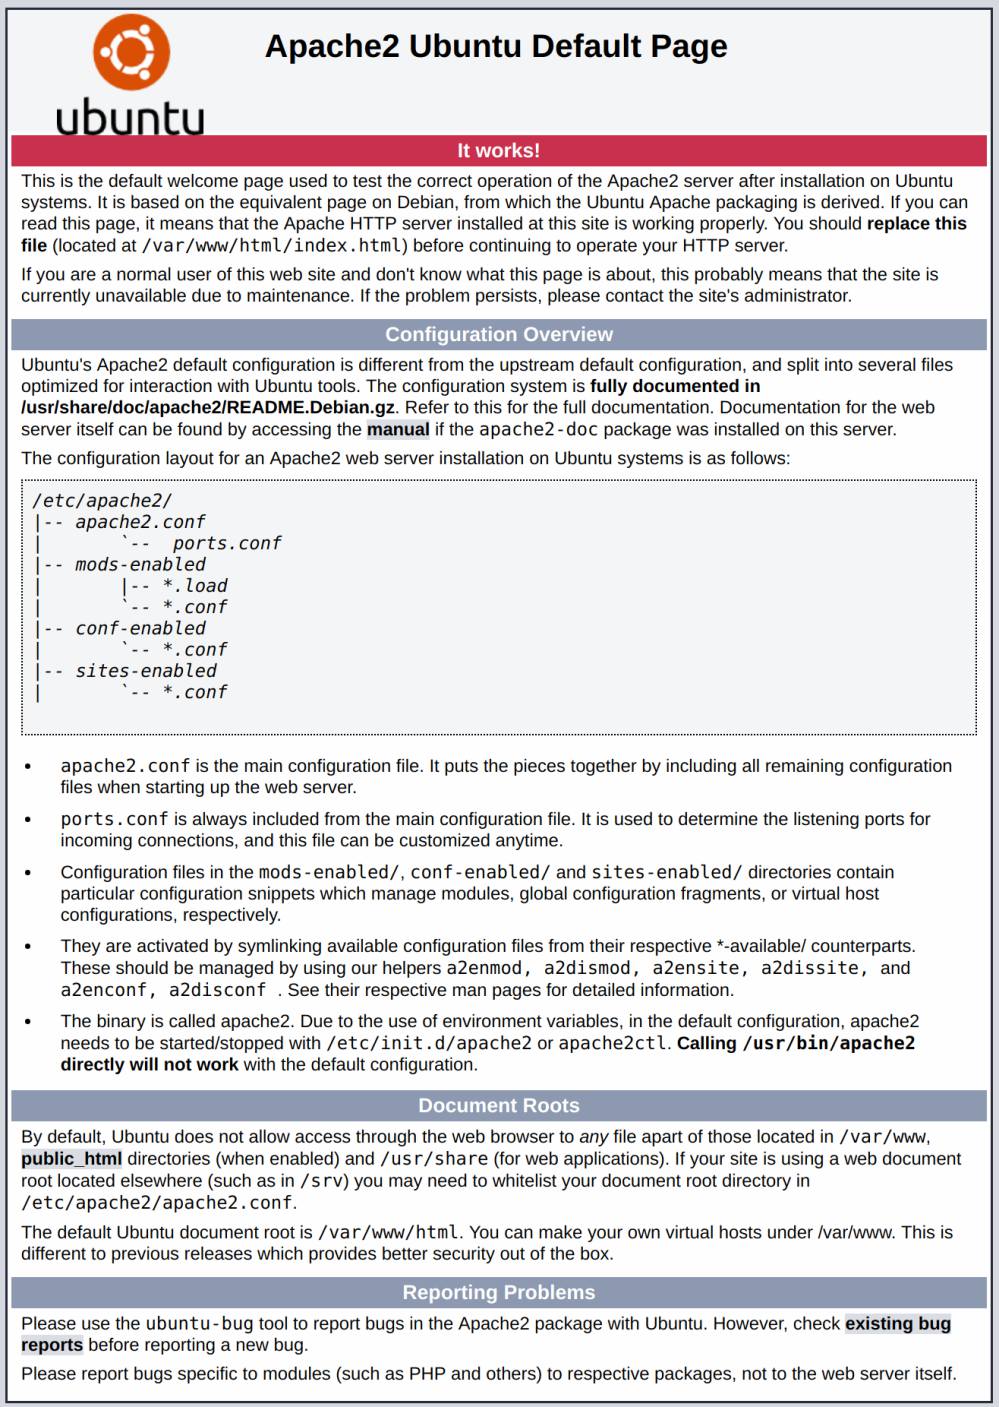
Apache installation successfully completed
Install MySQL Database
MySQL is a popular database management system used within PHP environments. It store's most of your web-data.
An alternative Database is MariaDB and highly compatible with MySQL, because many of the developers of MySQL were involved in its development.
A list of some popular databases here.
Install MySQL: $ sudo apt install mysql-server
confirm installation by typing Y, and then ENTER.
When the installation is finished, it’s recommended to run a security script that comes pre-installed with MySQL. This script will remove some insecure default settings and lock down access to your database system. Start the interactive script by running: $ sudo mysql_secure_installation
It present a question if you want to configure the VALIDATE PASSWORD PLUGIN.
Note: Enabling this feature is something of a judgment call. If enabled, passwords which don’t match the specified criteria will be rejected by MySQL with an error. It is safe to leave validation disabled, but you should always use strong, unique passwords for database credentials.
Answer Y for yes, or anything else to continue without enabling.
VALIDATE PASSWORD PLUGIN can be used to test passwords
and improve security. It checks the strength of password
and allows the users to set only those passwords which are
secure enough. Would you like to setup VALIDATE PASSWORD plugin?

Press y|Y for Yes, any other key for No:
If answer is Y, a new question followsThere are three levels of password validation policy:
LOW Length >= 8
MEDIUM Length >= 8, numeric, mixed case, and special characters
STRONG Length >= 8, numeric, mixed case, special characters and dictionary file
Please enter 0 = LOW, 1 = MEDIUM and 2 = STRONG: 1
Next question will ask to select and confirm a password for the MySQL root user. This is not to be confused with the system root. The database root user is an administrative user with full privileges over the database system. Define a strong password here as an additional safety measure.
If password validation enabled, the password strength for the root password entered shown. If satisfactory, enter Y for “yes” at the prompt:
Estimated strength of the password: 100
Do you wish to continue with the password provided?(Press y|Y for Yes, any other key for No) : y
For remaining questions, press Y and hit the ENTER key at each prompt. This will remove some anonymous users and the test database, disable remote root logins, and load these new rules so that MySQL immediately activates the changes made.
When done, test if you’re able to log in to the MySQL console: $ sudo mysql
A connection to the MySQL server is established as administrative database user root, which is inferred by the use of sudo when running this command. Output like this should be displayed:Welcome to the MySQL monitor. Commands end with ; or \g.
Your MySQL connection id is 22
Server version: 8.0.19-0ubuntu5 (Ubuntu)
Copyright (c) 2000, 2020, Oracle and/or its affiliates. All rights reserved.
Oracle is a registered trademark of Oracle Corporation and/or its
affiliates. Other names may be trademarks of their respective
owners.
Type 'help;' or '\h' for help. Type '\c' to clear the current input statement.
mysql>
Exit with command:mysql> exit
MySQL installation successfully completed
Installing PHP
PHP is the component that will process code to display dynamic content to the website visitors. In addition to the php package, you’ll need php-mysql, a PHP module that allows PHP to communicate with MySQL-based databases. You’ll also need libapache2-mod-php to enable Apache to handle PHP files. Core PHP packages will automatically be installed as dependencies.$ sudo apt install php libapache2-mod-php php-mysql
Once the installation is finished, run the following command to confirm your PHP version:$ php -v
The response should be similar to this:PHP 7.4.3 (cli) (built: Mar 26 2020 20:24:23) ( NTS )
Copyright (c) The PHP Group
Zend Engine v3.4.0, Copyright (c) Zend Technologies
with Zend OPcache v7.4.3, Copyright (c), by Zend Technologies
At this point, your LAMP stack is fully operational.
the default root directory of the Apache server points to /var/www/html. The index.php file in this directory contains the Apache2 UBUNTU default page.
Testing the PHP processing
Create a PHP test script to confirm that Apache is able to handle and process requests for PHP files.$ nano /var/www/info.php
Nano is an DOS-style Linux editor. use arrow-keys to position the cursor where to enter or delete text. For more on the use of nano, look here.
Enter the text as displayed and save by pressing keys cntrl+x then y then enter
Test the script with a browser using the same address testing Apache.$ http://<server-ip-addr>/info.php
The result should display PHP overview file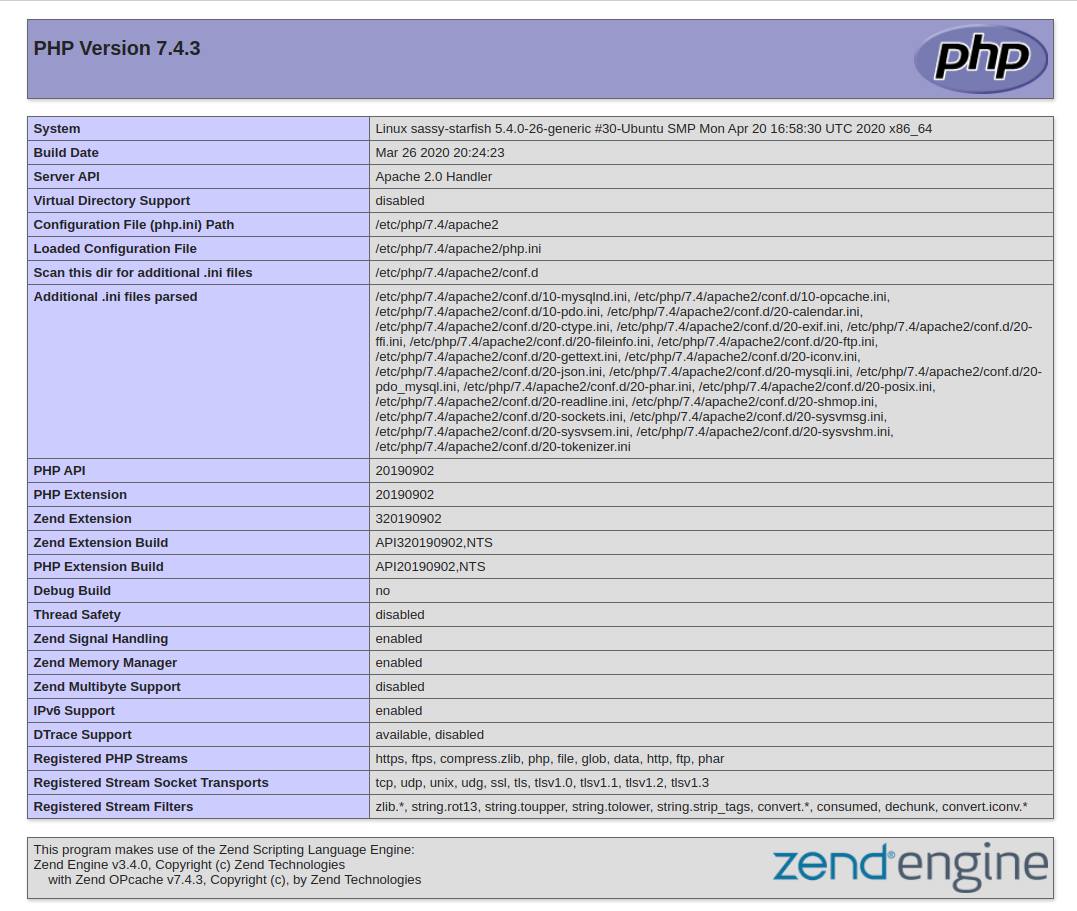
PHP installation successfully completed
Lamp installation completed
Port forwarding on home router
By default ALL ports on a home router are closed. Meaning no connection can be establish originating from the internet to the webserver (or any other device on the home network).
To access the webserver from the internet, ports 80 (HTTP) needs to be forwarded to the PC running the webserver.
The ports forwarding page layout and wording is different for each router brand and even model.
But in general the data to input is the same.
- Application Name: Any descriptive name (example: webserver)
- (External) Port range: (can also be a single port)
- Start: 80
- End: 80
- (Internal) Port range: (can also be a single port)
- Start: 80
- End: 80
- Protocol (Service type): both (TCP, UDP or both)
- (internal) IP address: 192.168.100.200 (the IP address of the PC-LAN accessing the webserver)
An illustrated guide with a number of popular router brands can be found here
Check if the "Apach2 Ubuntu Default page" or "PHP overview" is downloaded when using the public IP address in a browser like
$ http://<public-ip-addr>/ or $ http://<public-ip-addr>/info.php/If no page is downloaded or an error is displayed, the portforward setup is incorrect.
To know your public-IP-address, type in the address bar of any browser "what is my ip address".
Domain name
A DOMAIN name is a translation from a readable name into an IP address.
The webserver can be accessed from the Internet using just IP address. A domain name is not strictly needed.
Most residential Internet subscriptions use a dynamic public IP address, Meaning it can change every time the modem/router restarts or after a power interruption or even after ISP maintenance work. This makes it hard to keep track of you IP address changes and to access the webserver from the Internet using only the public IP of the broadband connection.
To make life easier, a number of companies offer free DDNS (Dynamic Domain Name Service). A list of free DNS here.
The limitation is the suffix (TLD) of the domain-name, has a fixed choice with sometime weird names.
freemyip.com
One in particular makes it extremely simple to maintain a DOMAIN name: freemyip.com
The service will create a DOMAIN Name linked to a token. So it is important to SAVE that token.
Updating the public IP address is done by sending a request through an internet-address like this:
https://freemyip.com/update?token=fe2654e9fb2c39fa7228da1f&domain=homepage.freemyip.comThe token 'fe2654e9fb2c39fa7228da1f' is linked to the domain name 'homepage.freemyip.com' and it updates the IP-address with the one this request was sent from.
The webserver can update the DOMAIN name IP address every 19 minutes using CRON job with command:
$ (crontab -l;echo "*/19 * * * * curl \"https://freemyip.com/update?token=YOUR_TOKEN&domain=YOUR_DOMAIN.freemyip.com\">/dev/null 2>&1")|crontab -Check if the Cron Job is active:
$ contab -lCompare the CRON job with Windows Task scheduler.
The next step is to create a webpage and post it on the webserver at
$ /var/www/html/How to create a website is beyond this How To.
A number of Content Managing Systems (CMS) are free, most known are WordPress, Drupal, Joomla.
For more on free CMC look here
If errors are found in this How To or have a comment, send an email to
Thank you for visiting this site!

