
Virtual Machines (VM) are a perfect tool for testing and exploring various operating systems and application. The How-To describe here uses Oracle VirtualBox running on a Windows host. VirtualBox is free to use. VirtualBox runs best on modern CPU's with multiple cores/threads with 8GB RAM minimum. More cores/threads and RAM capacity for better VM performance. Graphical demanding apps like games and video editors do not perform well on VM's.
- Download the Windows package here: VirtualBox download page
- Open the Installation Setup Wizard:

Select Next - Custom Setup

If necessary change the location on disk and select Next.
Select personal choice of shortcuts positions and file-associations and select Next - Network disconnect warning

Heed the warning. Save and close online documents and apps. Select Yes to continue - Ready to Install

Point of no return. If all setup selections are OK select Install
Select Back to change setup selections - Installation progress
Depending on your windows setup, allow administrator level tasks.
During the installation below request to install device software.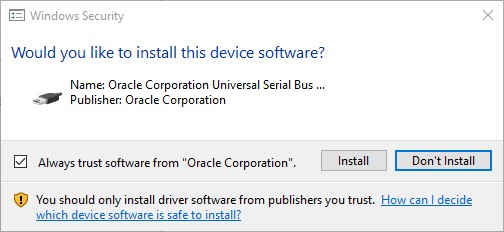
This is an integral part of the installation. Selecting Don't install will abort the VirtualBox installation.
Select Install to continue. - Installation Complete

Select Finish. - VirtualBox Manager

At this point VirtualBox is ready to install the Guest OS (VM) of your choice: List of Guest OS
Windows OSes may require license to run. Most Linux distributions are free.
In this example ReactOS will be used.
ReactOS is an operating system.
Our own main features are:
- ReactOS is able to run Windows software
- ReactOS is able to run Windows drivers
- ReactOS looks-like Windows
- ReactOS is free and open source
- Download the ReactOS from this page.
The iso-file may be zipped. Unzip it. - Create new VM

From the Machine menu select New
Enter a name, where you want to store the new VM and type and version of the guest OS, in this case another type of MS Windows
Memory and disk creation
Depending on the Host memory total and use, select memory capacity for Guest-OS. More memory is better VM performance, but can degrade performance on host.
The next 4 panels will create a virtual disk. The size depends on the minimum Guest-OS needs and what kind of apps will be installed on the Guest-OS. Most other selection can be left to default as displayed.


- VM configuration
The Virtual Machine hardware is now created, ready for the Guest OS to be installed. Some useful tweaks on the settings depending on your choice. Select menu Machine -> Settings.
The following panels show useful settings
Shared clipboard enables copying text, links and images from host to guest and vice-versa.
Drag'n drop enables copying files between host and guest by dragging and dropping.

Select at least 2 CPU's for the Guest OS to enhance performance.


Depending on preference, Select NAT (network communication runs via host) or Bridged Adapter (network communication is shared with LAN adapter. This will connect to the network as an computer with its own IP)
Instead of creating a CD/DVD of the downloaded ReactOS-ISO-file, attach the ISO file as virtual CD/DVD.
The VM is now ready to install ReactOS. - Start the Guest OS
Form the menu Machine -> Start.
Since the CD drive is set as first-boot, it starts reading the ReactOS ISO file
Follow the installation instructions as if you install on a real machine.... - The final ReactOS installation

